.png)
Powder Room Makeover Reveal
- Ore Oderanti
- Oct 15, 2021
- 5 min read

This post may contain affiliate links, which means I'll receive a commission if you purchase through my link, at no extra cost to you. Please read full disclosure here.
Hey fam, I am finally going to share with you how I did the makeover for this powder room from what it was, to what it is now, along with the challenges I faced along the way. So stay tuned and continue reading below...Here is what this powder room looked like BEFORE


It was a very dark small space with beige like walls and being that it was on the main floor of my in-laws house, it wasn't very inviting for guest to use as well so I set about wanting to change all that. The first thing I did was to lay my vision and budget down on a moodboard which you see below:

I wanted to find a cost efficient way to save while still creating a cozy space but all that quickly started to unfold as I began the process. My original plan was to add wallpaper halfway up the middle wall that sits right when you walk in, above the toilet. Then use Sherwin -Williams paint in "Leisure blue" to paint the rest of the walls and Sherwin-Williams paint in "Tricorn black" to paint the trims. Well the wallpaper arrived and that's where the changes began. First there are various shades of blue in the wallpaper as you see from above so I would have needed to use different shades for this wallpaper in that small space. It just didn't look right. Secondly, when I ordered this wallpaper, I ordered the peel and stick version which I love because I have previously used peel and stick in other projects but from Target. I decided to try somewhere else for this one and let's just say that the adhesive wasn't strong enough to hold it up and it just looked flimsy so I took it down and decided to handpaint the drawing instead. Here's what the wall looked like when I was going to paint the other walls in blue.

Before starting anything else again, I prepped the entire space, took out the old medicine cabinet, cleaned the walls, threw out the old vanity sinktop, but left the old vanity cabinet to give it a makeover by painting it and adding new cabinet pulls. Then I changed the old heater cover and installed new ones which was easy to do, thanks to Home Depot. I then started by taking out the old cabinet and cleaned out the debris that was sitting under it. Then I changed out the old plumbing pipes and put in new ones from Home Depot and also installed the old cabinet back. I washed the surface of the cabinet with TSP (Trisodium Phosphate) because the cabinet was really old and I wanted to make sure the paint would go on smooth and stay on so this really helped with that. Then I sanded and cleaned off the entire surface before painting in Sherwin-Williams Tricorn black with a semi-gloss finish.
Then I installed the new sink top and faucet, connected it to the drain pipe at the bottom, attached the new brass finish cabinet pulls which I got from Amazon and voila! you can't even recognize it. See for yourself below what the sink looked like before and continue reading to see the end result and let me know what you think....by the way I did not think I would be doing this much work. I mean, I became a plumber overnight, haha!! Thanks to Youtube videos of how to do it right.


After that I proceeded to install some beadboard panels I got from Home Depot. Used a nailgun and construction adhesive to attach the beadboards to the bottom half of the wall and then painted it in the same Sherwin-Williams Tricorn Black.
For the walls, before I handpainted, I decided to use a fine finish on the wall and try something new. I used venetian plaster which required 3 coats and a lot of work pasting it on the wall and burnishing the plaster to a fine finish. Let me tell you, it turned out amazing and it gave a smooth advantage for me to hand draw the pattern I wanted on the wall. Check out that glossy shine!! (Insert happy dance)


Oh also before I forget, remember the old vanity that I changed..? Well I replaced it with an LED mirror, that is not only efficient but also elegant and functional. This was also easy to install and I got it from Amazon. I will be linking everything I used in this makeover below. Checkout the before and after here


This project was definitely a challenge to say the least, started out wanting to do tiny cosmetic changes and ended up revamping and learning new tools along the way. I also definitely give kudos to plumbers, construction workers who work in all kinds of spaces no matter how small (I remember trying to fit my small self in that space to install the plumbing kit - boy was that hard!!) And thanks to Home Depot and their awesome employees who answered every question I had and helped me with the large cuts I made on this project all the way. Thanks to you friends for reading with me all the way to the end. Check out the reveal pictures below and if you enjoyed this read please like, comment below and share with someone.


WHAT I LEARNED FROM THIS PROJECT
Measure! Measure!! Measure!!! Can't stress that enough. As with all design projects, whether you are doing it yourself or having someone do it for you, measuring as close as possible for your space or a piece of furniture could make all the difference. The last thing you want is trying to fit a large sofa in a small space or in my case, cutting a panel that is too long or too wide to fit the space.
Have the right tools. It was great to be able to rent the nail gun and the jigsaw from Home Depot otherwise I don't know how I would have gotten through this project.
Don't give up. I can't tell you how many times I almost gave up on this project. As a wife and mom of 3 and also working part time, it felt draining and just unreachable at some point. But for me I prayed about it, saw the end in mind, got encouraged and hey you see the end product right? So what can you use to encourage yourself today?
Do something you love and live in a place you love. You will be surprised how small changes you take everyday to make your space your own inspires you to keep going. And guess what, when you are in your zone, all the inspirations start flooding in right? So take sometime to make small changes today that can help you define your space and if you still aren't sure where to start, I can help. Click on my link in bio to schedule your consultation today.
Tools Used
Angled Nail Gun - https://www.homedepot.com/p/DEWALT-20-Volt-Max-16-Gauge-Cordless-Angled-Finish-Nailer-Kit-DCN660D1/206528533
Ryobi Cordless drill and impact driver set - https://www.homedepot.com/p/RYOBI-ONE-HP-18V-Brushless-Cordless-1-2-in-Drill-Driver-and-Impact-Driver-Kit-w-2-2-0-Ah-Batteries-Charger-and-Bag-PBLCK01K/314109290
Paint Used
Sherwin Williams - Tricorn Black (From Lowes)
Sherwin Williams - Leisure Blue (From Lowes)
PPG Gold paint (Home Depot)
Other Materials
Walls
Venetian Plaster - https://amzn.to/2YDWDqE
Venetian Plaster Topcoat - https://amzn.to/3asGRkS
Beadboard panels - https://www.homedepot.com/s/beadboard%2520paneling?NCNI-5
Nails - https://www.homedepot.com/p/Paslode-2-in-x-16-Gauge-Galvanized-Angled-Nails-2000-Per-Box-650047/100351703?MERCH=REC-_-searchViewed-_-NA-_-100351703-_-N
Toilet paper holder - https://amzn.to/3aoasw3
Hand Towel holder ring - https://amzn.to/3iPtika
Cordless Blinds - https://amzn.to/2X3Z0Tc
Marble metal trash can - https://amzn.to/3uZ63Je
Vanity
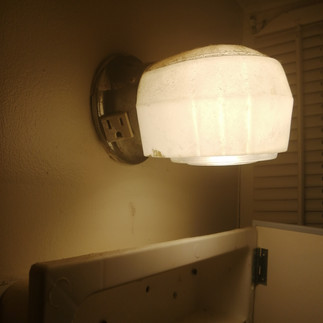
Vanity Bathroom wall sconce - https://amzn.to/3Doei4s
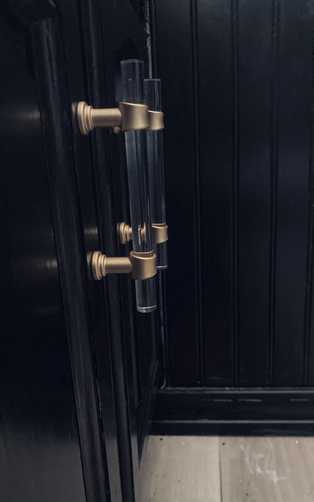
Gold cabinet pulls - https://amzn.to/3arLFqU
Gold Sink Faucet with Drain Assembly - https://amzn.to/2X384Ys
Vanity Sink Top - https://www.lowes.com/pd/Saint-Birch-24-in-Single-Bathroom-Vanity-Top-with-Sink-White/5001728443
LED Wall mounted circle mirror - https://amzn.to/2YyJWNG
Book Your E-Design Services Today
Looking for design tips and a mood board of curated pieces? Or want something that is tailored for you and your space? Would you like to redesign your home or need styling advice? Tired of living in a place that doesn't inspire you? Check out my package offerings below. Stop worrying and start feeling inspired to focus on what matters most to you.


Comments